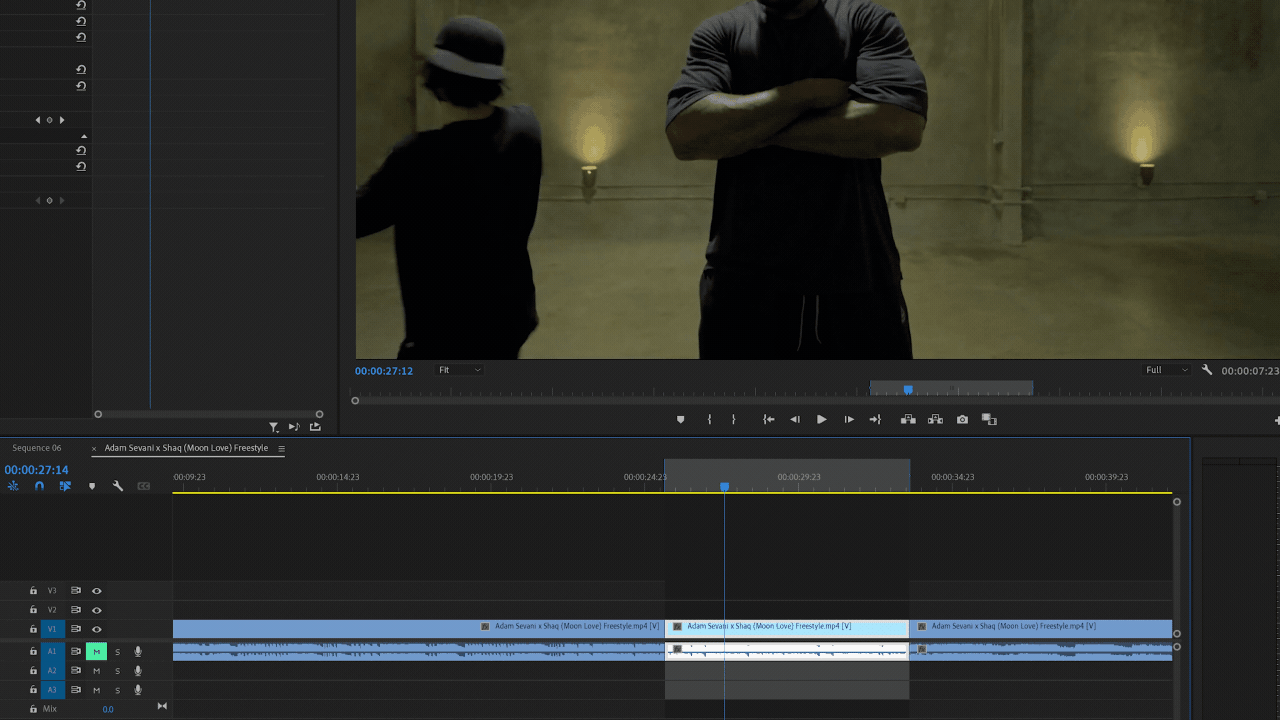
1 – choose the clip/video you want to reconstruct
in my case
let’s say this is what I want to rebuild.
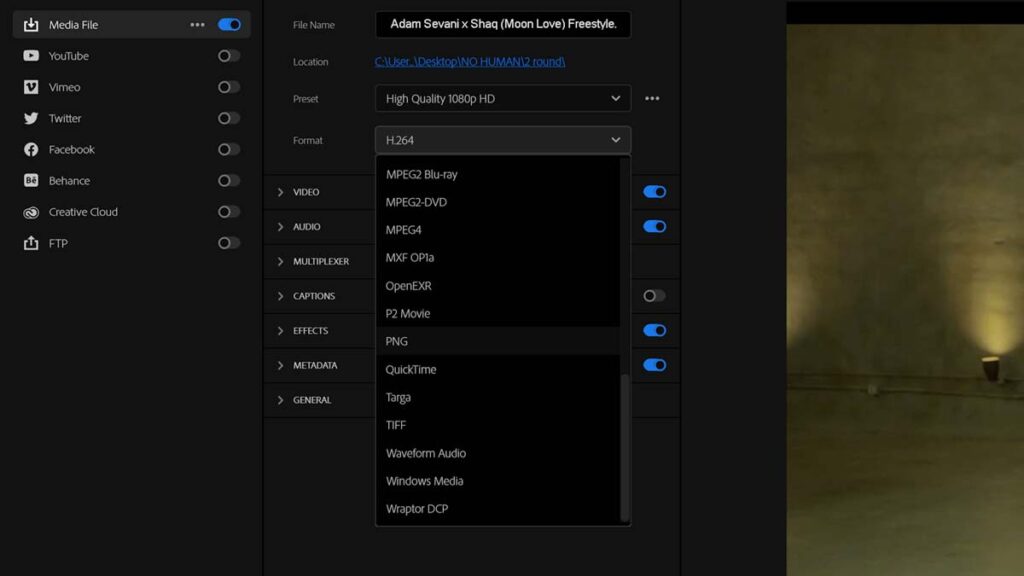
2 – Save as a “sequence’ clip
in Premiere Pro, go to Edit – Export – Media

3 – in Format, select PNG, name it, and then save it.
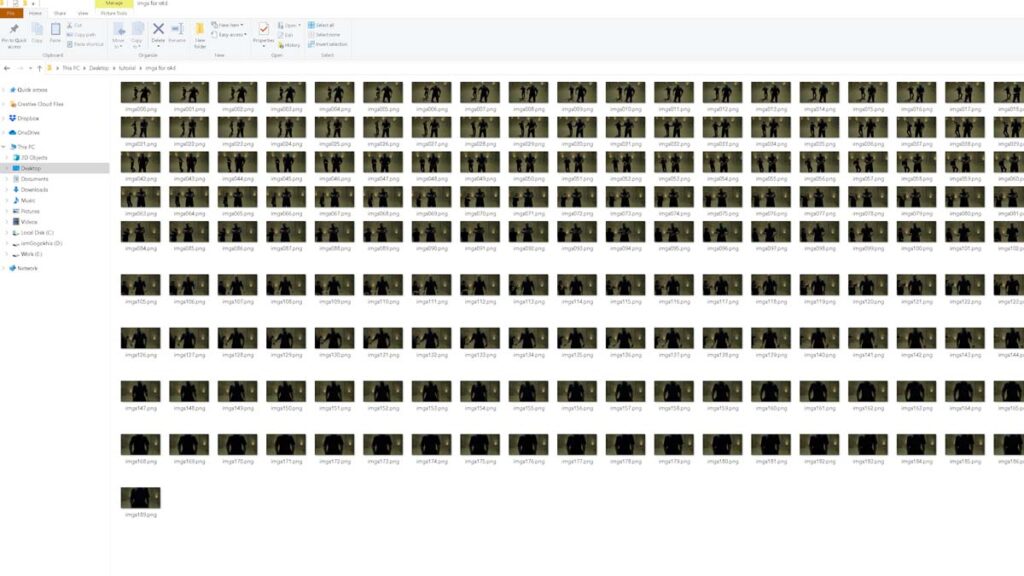
4 – When PP is done rendering, it should look like this.
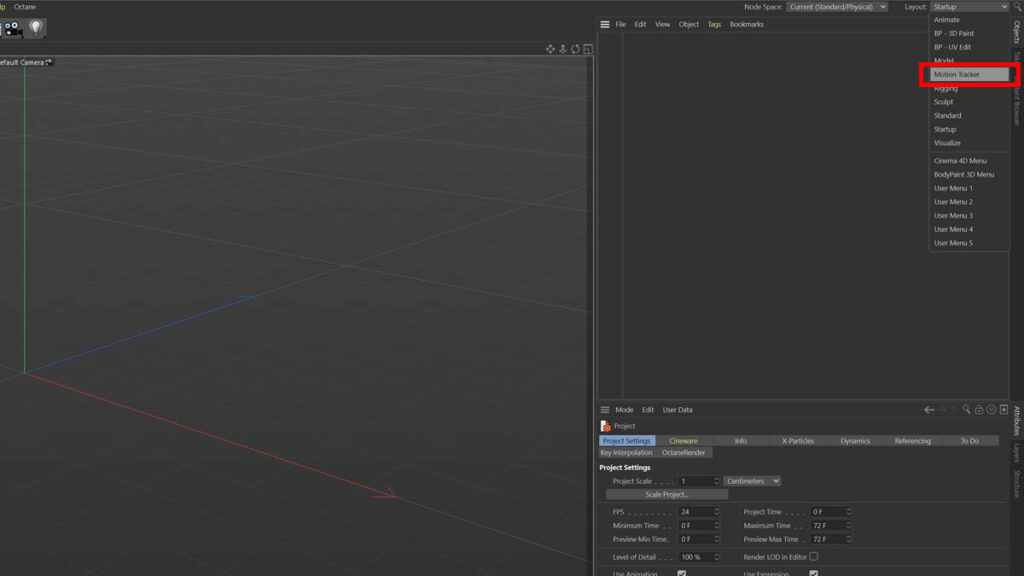
5 – open C4D

6 – original footage FPS should match the c4d project FPS

7 – change layout to Motion Tracker
8 – double click to select the footage

9 – click ‘footage‘
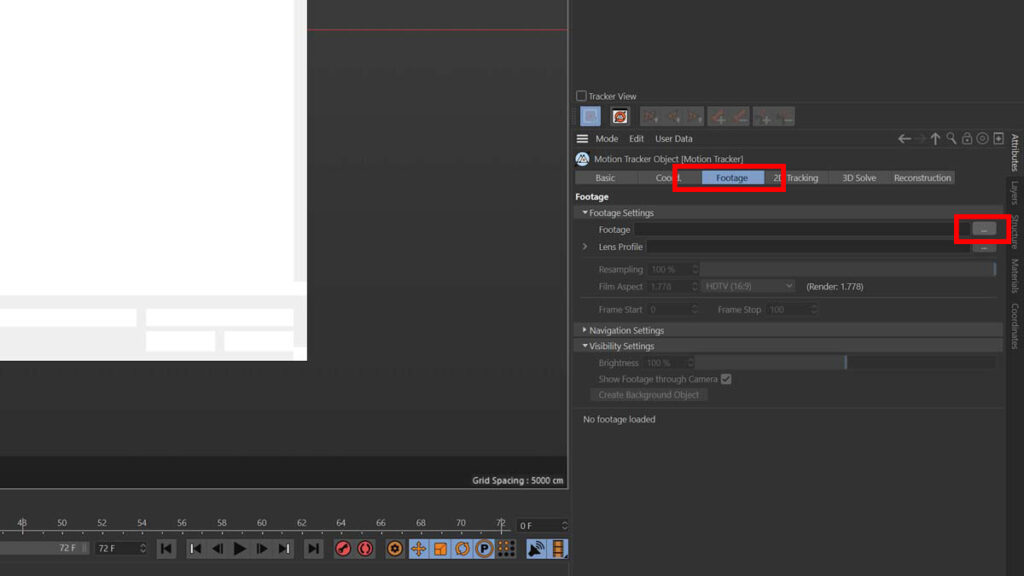
10 -it should look like this
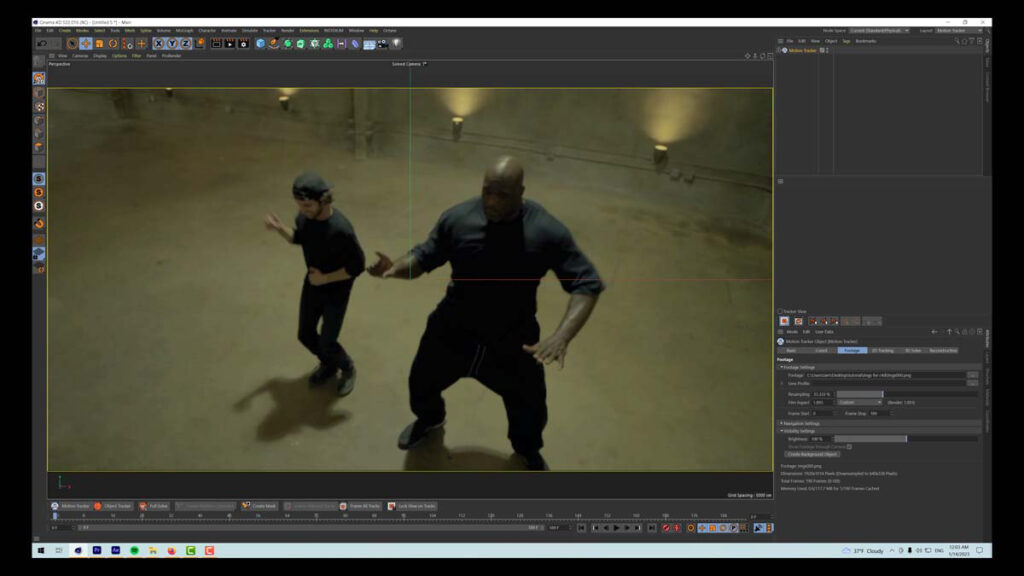
11 – resample to 100%

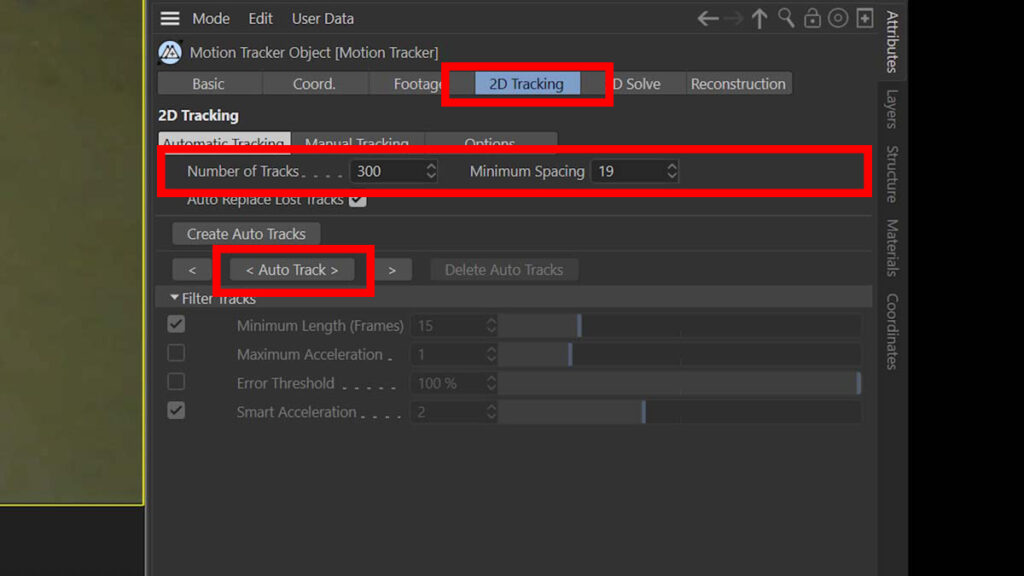
12 – click 2D Tracking
The number of tracks / minimum spacing – depends on the quality of your footage.
Some footage, cause of bad light, motion blur, or low res – might be challenging to track.
when ready, click Auto Track
13 – 3D Solve, then Run 3D Solver
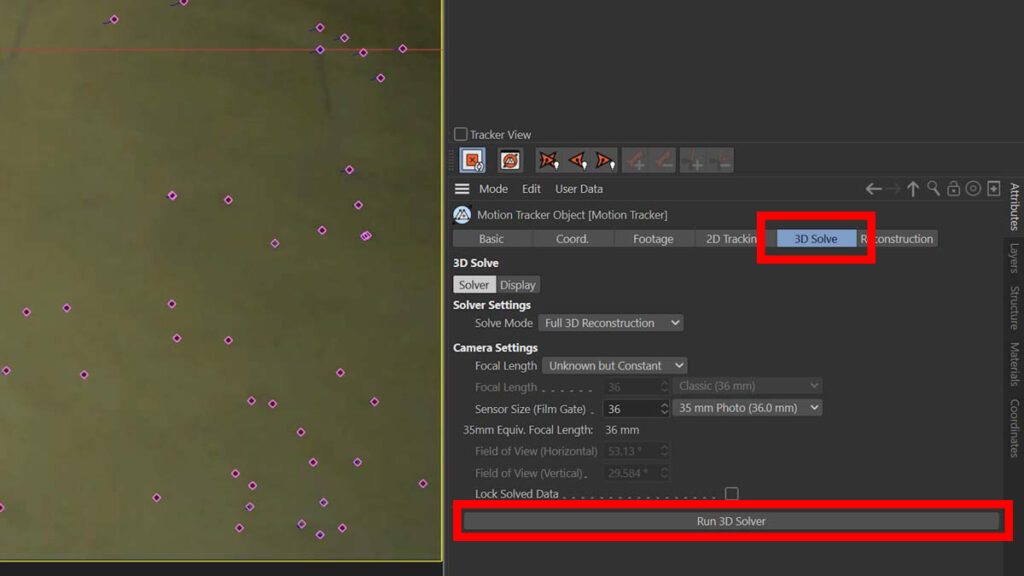
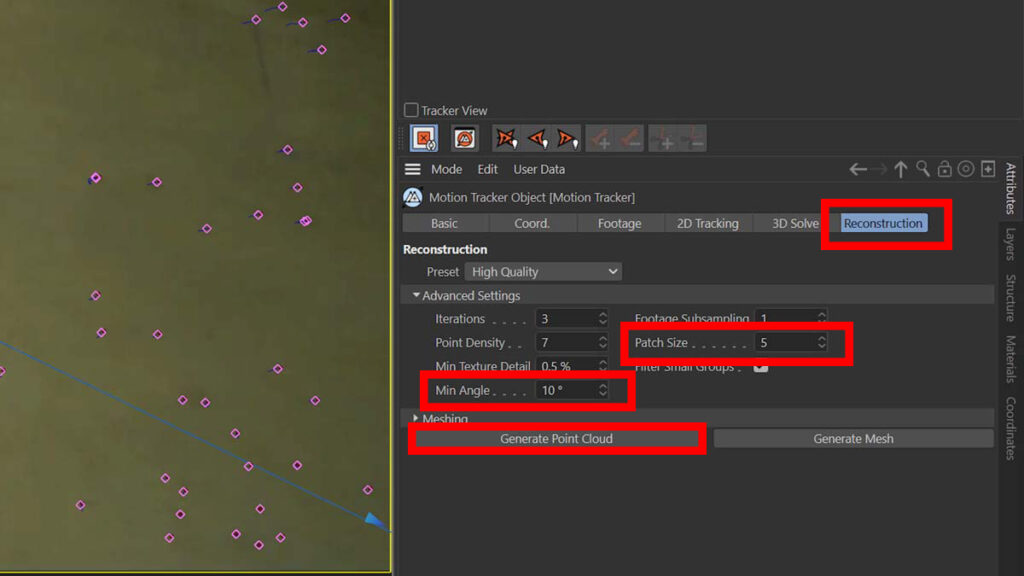
14 – and then, Reconstruction
Ok, here, as well! Depending on your footage!
if c4d cannot reconstruct the scene because of quality issue
try decreasing Min Angle and increasing Patch Size
helps with the ‘bad’ footage
and last,
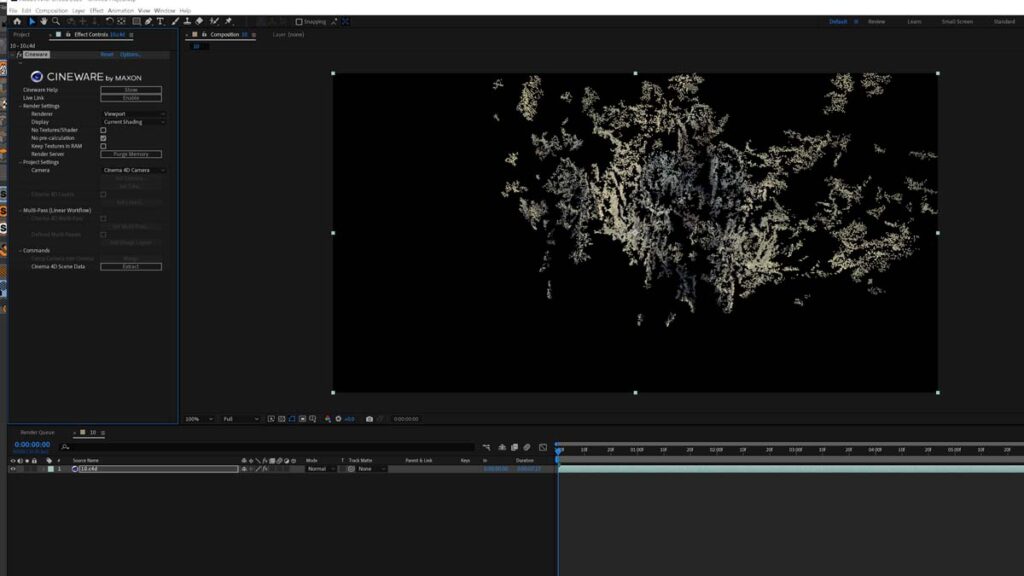
click Generate Point Clouds
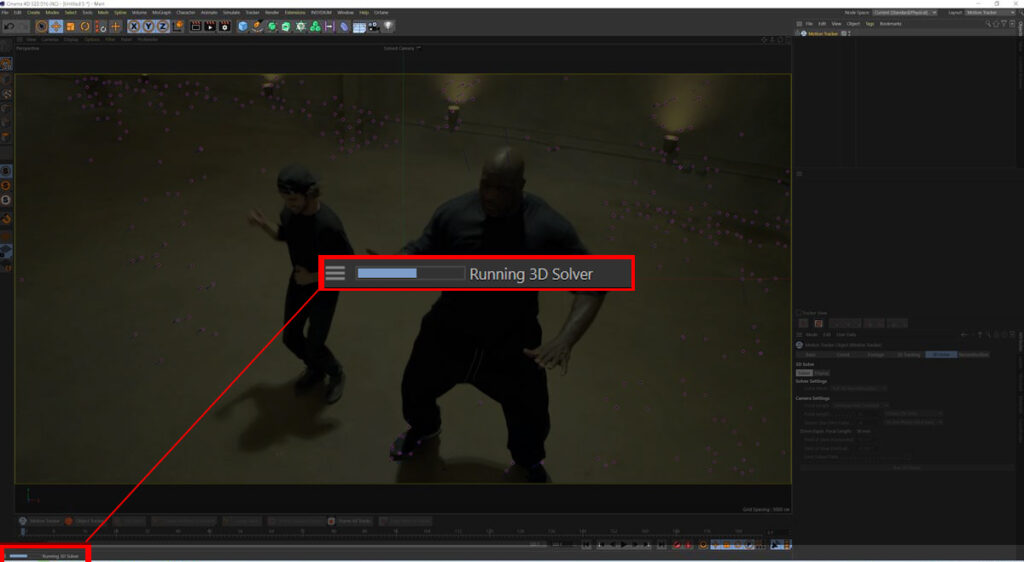
15 – c4d is going to start running a bunch of operations, might take some time
if you try to reconstruct the 4k video, my advice – go for a walk) come back after vacation, might be done by then)
Anyways, the point it – if it’s heavy, wait for it!
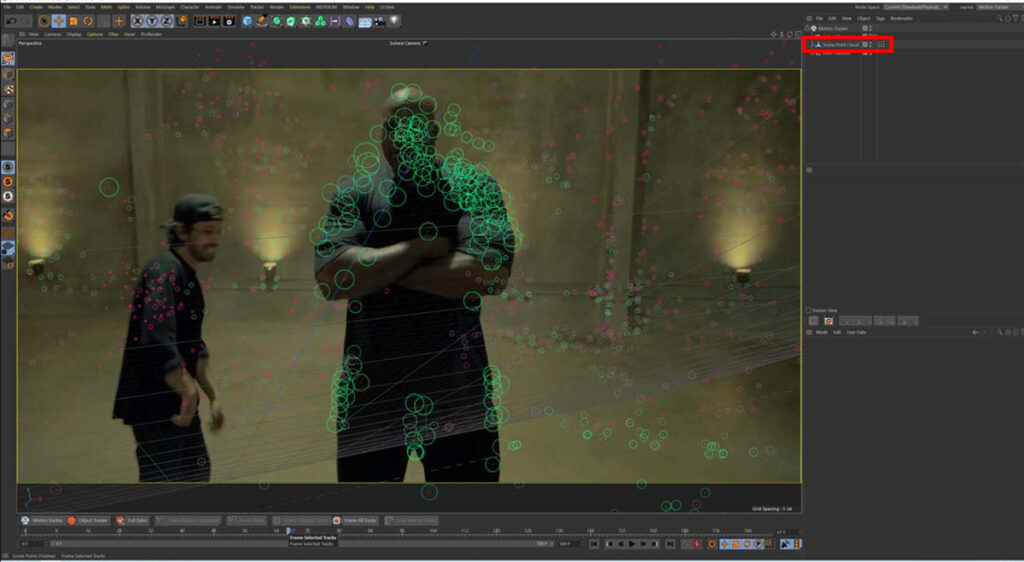
16 – when it is successfully reconstructed, new icon should appear in your list
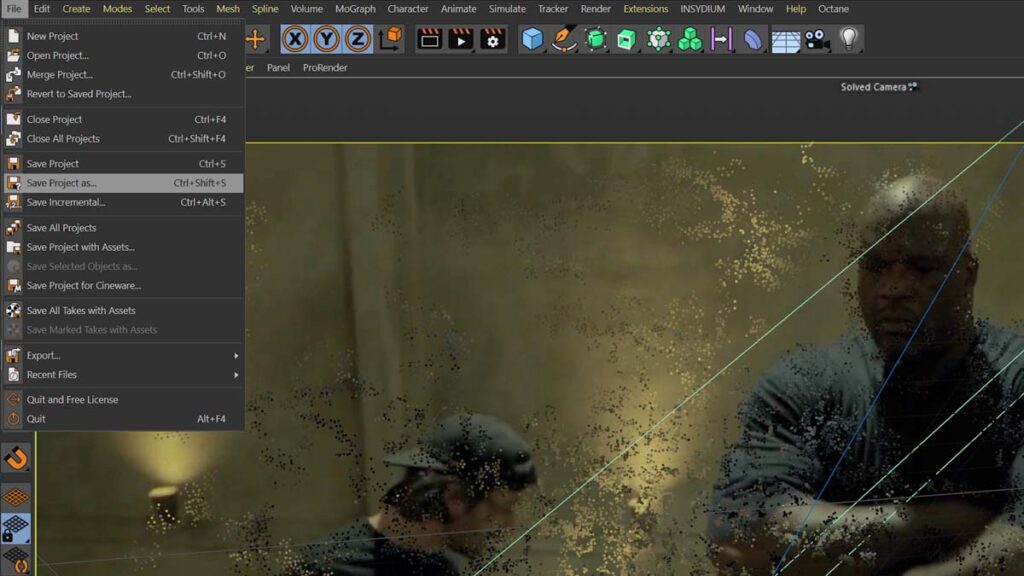
17 – save the .c4d project
18 – open AE
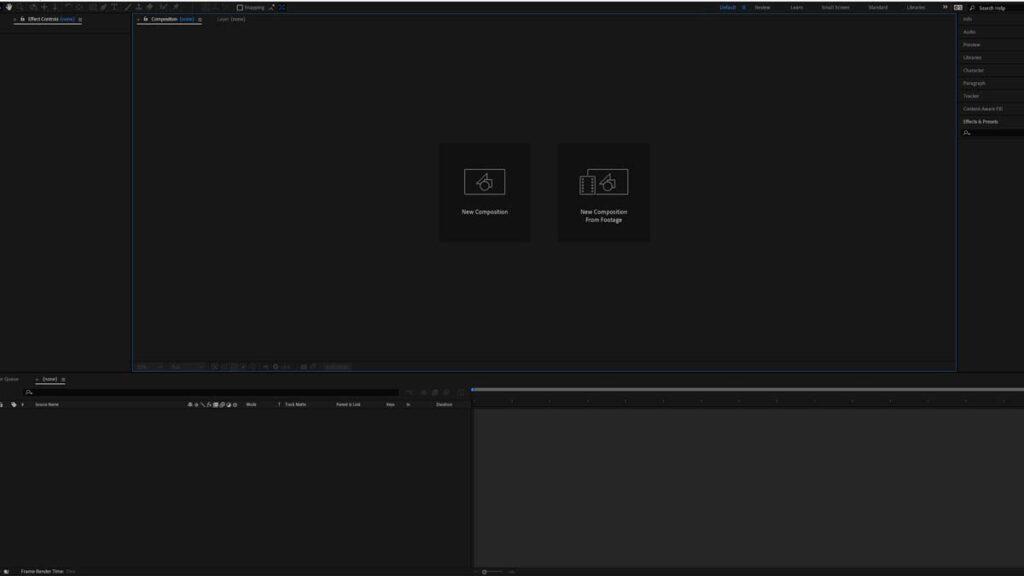
19 – import .c4d file

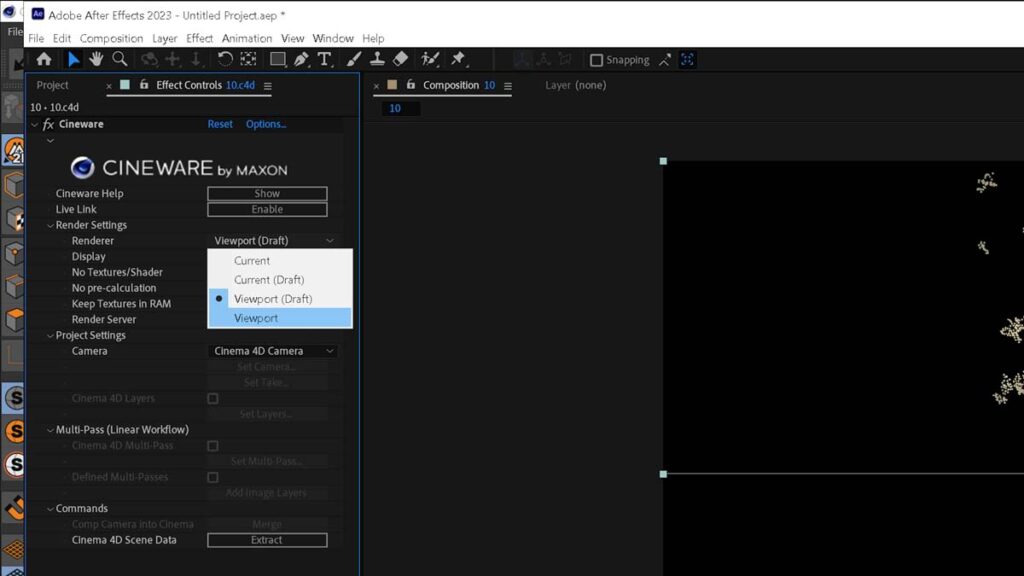
20 – set the camera quality to FULL

21 – set the renderer to VIEWPOINT
22 – done